Scorpion UVC-LED Commercial
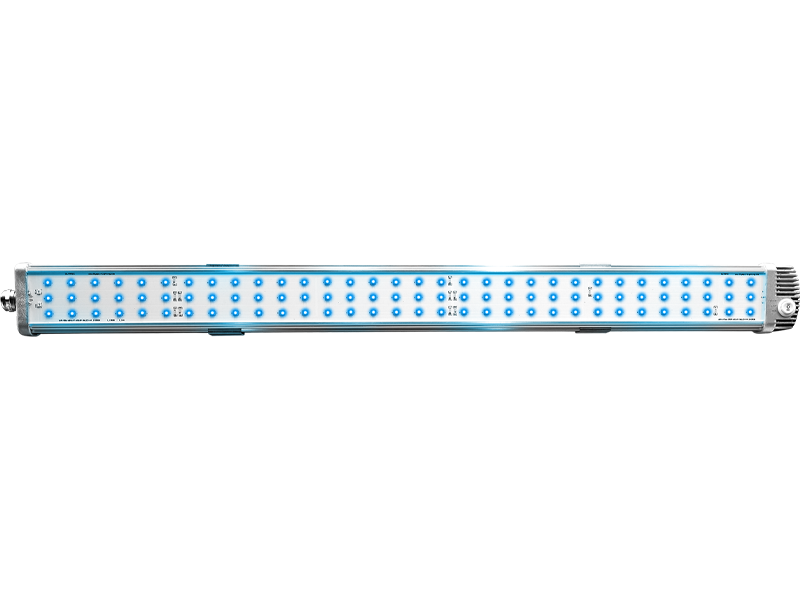
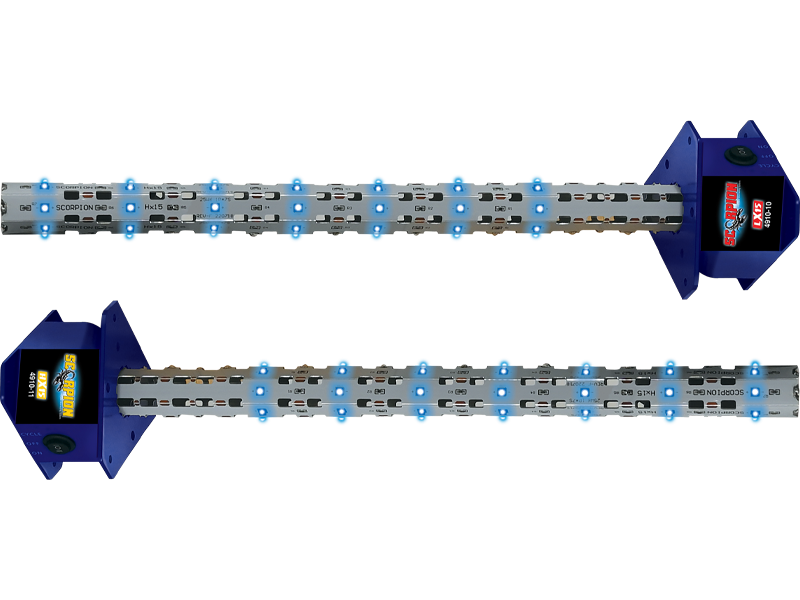
• 30˝ UVC-LED Disinfection System
• Advanced commercial grade system
• Over 5X the life compared to standard bulbs
• Rugged design with shatterproof and waterproof LED
• Kills mold, mildew, viruses and bacteria on and around your HVAC coil
• Stops foul and musty odors like dirty sock smell
• Reduces harmful biofilm on the coil and surrounding area
• Integrated mode switch for two run modes
• Air flow switch to power only when system is running
• 30,000 hour LED timer to notify when replacement is needed
• Easy install with adjustable mounting brackets
• Commercial grade magnets included
• 208-480VAC high voltage installation
• Optimum 265nm wavelength for germicidal capabilities
• Meet’s UL 2998 zero ozone emission certification
Description:
The Scorpion CX30 is a 30” UVC-LED disinfecting system designed for use in commercial HVAC systems. The LED lights have 30,000 hours of run time and with an integrated air flow sensor the Scorpion CX30 can last up to 5 times longer than traditional UV bulbs. The CX30 comes with an integrated 30,000 hour LED timer to notify when a replacement is required. The Scorpion CX30 is designed to kill mold, mildew, bacteria, and other harmful biological growth in the HVAC system and on the evaporator coil. The system will also help reduce foul and musty odors like dirty sock smell and will even help keep the drain line from clogging due to buildup in the condensate line.
Scorpion CX30 is designed to treat any commercial HVAC system with no maintenance for up to 30,000 hours of treatment life. The system can easily be installed using the adjustable mounting brackets and commercial grade magnets. If the Scorpion CX30 is being installed in a system where the magnet can not be used than use the supplied hardware to mount the Scorpion to your system. The powerful LED light should be installed in a location where it is fully shining on the evaporator coil to provide complete treatment.
| Packaging Size | Part Number | Additional Info |
|---|---|---|
| CX30 | 4910-20 | 208-480 VAC |
Directions:
IMPORTANT
• Only qualified technicians should install this product
• Install in accordance with relevant building codes
• Read instructions and safety instructions carefully before installation
WARNING: PROTECT EYES FROM UV LIGHT. TURN OFF UNIT OR DISCONNECT ALL POWER BEFORE SERVICING.
MOUNTING LOCATION
Before installing the Scorpion CX30, it is necessary to determine the optimal mounting location inside the air system. Consider an installation location that will allow the Scorpion UVC LED light to shine on the greatest surface area of the coil. For enhanced antimicrobial effect, multiple Scorpion UVC-LED lights can be installed in the system. Below are various placement options for the ScorpionLED.
MOUNTING INSTRUCTIONS – Using Provided Magnets
STEP 1: Confirm power is off to the system. Remove the access panel to the air handler.
STEP 2: Locate a magnetic surface across from the evaporator coil where you will install the CX30.
STEP 3: Adjust the included mounting brackets to the desired angle.
STEP 4: Attach the CX30 to the magnetic surface using the included magnets.
STEP 5: Secure the adjustable brackets using a phillips head screwdriver and the included 7mm socket to ensure the brackets are locked in place.
Continue to the wiring instructions to complete installation of the CX30.
MOUNTING INSTRUCTIONS – Using Self Tapping Hardware
STEP 1: Confirm power is off to the system. Remove the access panel to the air handler.
STEP 2: Locate a surface across from the evaporator coil where you can install CX30 with sheet metal screws.
STEP 3: Using a Philips screwdriver remove the provided magnet from the adjustable bracket.
STEP 4: Adjust the included mounting brackets to the desired angle.
STEP 5: Secure the CX30 to the desired location through the holes in the adjustable mounting bracket using the provided hardware.
STEP 6: Secure the adjustable brackets using a phillips head screwdriver and the included 7mm socket to ensure the brackets are locked in place.
Continue to the wiring instructions to complete installation of the CX30.
WIRING DIRECTIONS
STEP 1: Connect the Scorpion to high voltage 208-480VAC power using the white (neutral) and black (hot) wires. Connect the green (ground) wire to a proper ground source. See figure 1.3 below.
Step 1A: The Scorpion can be wired directly to the HVAC system power or add a transformer as needed. Wire the Scorpion to continuous power, do not connect to the blower relay.
Step 1B: For safety, ensure the black (hot) wire is wired through the unit’s door interlock switch as shown in Figure 1.3. This will ensure the CX30 does not power on when the door is opened and the safety switch is engaged.
STEP 2: Set the Scorpion power switch to “ON” for constant run mode. Set the power switch to “CYCLE” to run only when the fan is running and the integrated air flow sensor activates the Scorpion to power on.
(The cycle mode is recommended for longer service life for most applications.)
STEP 3: Replace the access panel to the unit.
STEP 4: Place the provided WARNING/INSTALL DATE sticker on the exterior of the unit.
STEP 5: Add the date of installation using permanent marker on the sticker.
STEP 6: Restore power to the unit.
STEP 7: Register the Scorpion’s warranty at www.nucalgon.com.scorpion-registration
INSTALLING SIGHT GLASS
Step 1: Find a proper location on the outside of the ductwork where you will be able to see the Scorpion’s 30,000 hour timer LED. The LED timer is located on the endcap of the Scorpion CX30.
Step 2: Drill a ½˝ hole through the ductwork.
Step 3: Firmly press the provided sight glass into the hole for your viewport.
REPLACING THE CX30 – 30,000 Hour Run Timer
The Scorpion CX30 needs to be replaced after 30,000 hours of run time. The CX30 is equipped with a run timer and LED that will notify you when it needs to be replaced. When the CX30 hits 30,000 hours of run time, the red LED on the endcap of the Scorpion will change from solid red to blinking red. A blinking red LED means the CX30 is no longer providing complete disinfecting
capabilities and needs to be replaced.
IMPORTANT
Some materials inside the air system (including filter media, flex duct, wiring etc.) may not be UV light resistant. Use reflective tape to cover these components.
LIMITED WARRANTY
The Scorpion offers a limited warranty for three years or 30,000 hours of run time that covers any defects in material or workmanship under normal use. For a valid warranty your Scorpion must be registered through Nu-Calgon on the date of installation If you make a claim during the warranty period, you must provide proof of purchase and proof of proper installation by a licensed contractor for the warranty to be valid. The Scorpion warranty does not cover labor, return shipping charges, damage from improper installation or improper voltage usage. The Scorpion warranty begins on the date that the unit was installed. Installation of your Scorpion by any person other than a licensed contractor will void the warranty. Contact your local Nu-Calgon account manager or info@nucalgon.com with further questions.
Product Information:
Literature Downloads
Download the product bulletin and other relevant literature here.

